Your Cart is Empty
FREE DELIVERY ON ORDERS OVER £20.00


We answer your frequently asked questions...
Gripit products are available nationwide from recognised DIY and trade stockists, along with all good independent stores. Alternatively, you can buy online from gripitfixings.co.uk.
Gripits are not suitable for Cantilever, extendable, "pull out" or full motion TV Brackets. This type of installation causes immense stress on the plasterboard and tends to result in the plasterboard failing. Gripits have only been tested for suitability of cantilever installation of depth up to 150mm (where the max weight load decreases dramatically) from the wall on other installations. However, extendable TV brackets are still not recommended to be used. Please see each gripits tecnical information on weight loads.
We recommend a flat drill bit or a hole saw. Please ensure that you are using the correct drill bit size for your fixing.
The use of a twist drill bit is not recommended due to the tearing effect this produces at the back of the plasterboard, where the Gripit wings need to open.
Yes. You will need a diamond hole cutter sized correctly for your fixing diameter and a suitable saw/file to cut four small slots in the tile (these are to accommodate the Gripit's anti-rotation fins).
Do not cut slots into the plasterboard - the wings will do that as you tap the fixing into place. Please contact us for further information.
If you can't see an opening in the cavity, firstly check you have drilled the whole way through the plasterboard. Otherwise, It may be that you have hit an obstruction (e.g a dab of plasterboard adhesive).
To fit the Gripit into dot & dab you will need to use a undercutting tool to create a recess in the adhesive which will allow the wings to open.
Standard length screws/bolts are supplied with every Gripit. You can use a longer one if necessary for the job, however the screw should not touch any solid material behind the plasterboard. Do not use a screw shorter than the below recommendations.
Yellow - Wood screw (4mm diameter, min. 25mm length).
Red - Wood screw (5mm diameter, min. 30mm length).
Brown - Bolt (M6 diameter, min. 25mm length).
Blue - Bolt (M8 diameter, min. 25mm length).
Yes, but don't worry. In addition to its unique wings, much of the strength of Gripit fixings is due to the large surface area that is in contact with the plasterboard.
In most cases, any item fixed to the wall will be large enough to cover and obscure the Gripit from view. Once installed, the Gripit becomes an integral part of the plasterboard and so will not compromise the wall's structure.
Any holes left after removing a Gripit can be filled as you would for any other fixing.
Installing Gripit is quick, simple and all you need is a drill (with the correct size drill bit), hammer and a screwdriver.
Use a flat drill bit to make a hole in the plasterboard.
Use a hammer to gently tap the fixing into the drilled hole.
Use a screwdriver to turn the centre cam and open the wings.
You're now ready to fix heavy stuff on the wall!
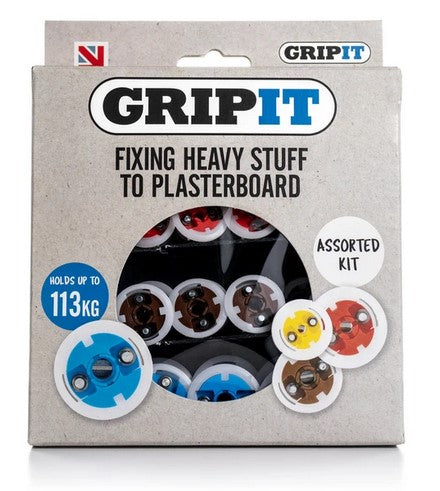
Gripit plasterboard fixings hold up to 113kg with no need for battens, wall modifications or compromises which saves time, money and labour. The unique gripping wings allow Gripit to be installed in walls with extremely limited cavity space. All Gripits are designed to be completely removable and reusable.
Yes. Our undercutting tool is specially designed to create a recess for the Gripit wings to unfold in plasterboard thicker than 15mm (e.g double thickness or insulated plasterboard)
Yes. Our undercutting tool is specially designed to create a recess for the Gripit wings to unfold if installing on top of a dab of plasterboard adhesive.
Our newest Gripits are designed to use both flat head and Phillips screwdrivers. Although Gripits aren't designed for specific screwdriver sizes we recommend the following:
To remove your Gripit from the wall, remove the screw/bolt and any attached hooks, brackets etc. Turn the centre of the Gripit a quarter rotation anti-clockwise with a screwdriver to close the wings. Then use your fingers, a flathead screwdriver or similar to gently pry the edge of the Gripit collar out of the wall.
Before using, shake your Marxman well to get the pigment moving. Test fire onto scrap material or in a discreet area to ensure that it is ready to mark the spot.
Gripit self-drive can be used with just a screw.
We don’t, however, advise using the securing screw of Gripit Yellow, Red, Brown or Blue as a hanging point .These fixings need the resistance of a hook or bracket against the screw or bolt head to pull the wings towards the rear of the plasterboard and provide a secure fit.
All Gripits have been independently tested on 15mm plasterboard. For more information on this please see the max load weight on the gripit listing page.
Holes can be filled using any method suitable for patching plasterboard walls. Please see here for one such method.
Yes. Each Gripit colour has its own minmum safe spacing distance.
Yellow: 25mm (centres)
Red: 30mm (centres)
Brown: 50mm (centres)
Blue: 100mm (centres)
Please see the listing data on each gripit description page for full technical data.
To become a stockist or distributor of Gripit, please give us a call on 01509 232757 or email: sales@charlesbentley.com We’d be delighted to hear from you!
We always aim to pack and dispatch your order as quickly as possible. Orders will be dispatched within 2 days so should be delivered within 3-5 days after your purchase. Once it’s ready, we’ll send an email confirming all the details of your delivery including carrier and tracking information – and we won’t charge your credit or debit card until this is done.
Standard: FREE when you spend £20 or more.
We’re happy to offer an exchange or refund on undamaged items within 30 days with a valid receipt or despatch confirmation note.
If you’ve lost your receipt or note, we can exchange items at the current selling price. All refunds will be via the payment method as before.